Program: Kid Pix Deluxe 3
Learner: Grades 2-6
Task 3: Print
Summary:
Print the animation.
Detailed Explanation using Kid Pix Deluxe 3:
a. Select the Print icon ![]() . A dialog box will appear.
. A dialog box will appear.
b. In the dialog box, Under Print Mode select Comic Book and under Orientation select Landscape or "Portrait" .
c. Click OK (Page will print out).
d. Label your print out by using a pen or pencil to add a Title, Name, Date, and also label each graphic.
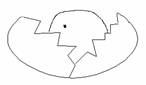
Example:
Detailed Explanation using Microsoft Word 2000:
a. Open Microsoft Word.
b. At the top of the page, select ![]() Center icon. Then enter a Title (e.g., Egg Animation). On the next line enter the name of the student. On the third line add the date.
Center icon. Then enter a Title (e.g., Egg Animation). On the next line enter the name of the student. On the third line add the date.
c. Press the Enter key three or four times to leave several blank lines.
d. ![]() Select Insert Table.
Select Insert Table.
e. ![]() Select a 2-column by 8-row table. *
Select a 2-column by 8-row table. *
f. Select File, Save As. Enter the document name. (e.g., EggAnimation.doc)
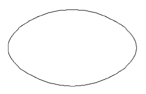
g. Open file egg1.kpx in KidPix
h. Select Scissors and choose the Square option.
i. To capture the entire white portion of the KidPix page, position the Scissors in the bottom right corner of the page, click and drag the Scissors to the top left corner. The entire page is now selected.
j. Press the Alt key to display the menu bar. Click the left mouse button. Select Edit. Select Copy.
k. Press Alt, Esc to go back to Microsoft Word.
l. In Microsoft Word click in the top left column of the table. Select Edit and Paste to paste the KidPix page into Microsoft Word.
m. Click on the picture. Then select Format from the pull down menu. Select Picture, then select the Size tab.
n. If not already selected with a checkmark, click the Lock Aspect Ratio and Relative to Original Picture Size boxes so that the picture will resize evenly.
o. Change the Scale, Height value to 50. Select OK.
p. In the second left column enter the name of the animation graphic.
q. ![]() Save your work.
Save your work.
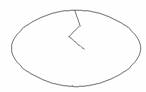
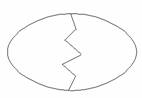
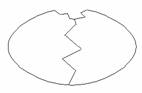
r. Repeat steps g through q for Egg2.kpx, Egg3.kpx, and Egg4.kpx.
s. Click ![]() to print your graphic on either a colour or black and white printer.
to print your graphic on either a colour or black and white printer.
* You need a 2 x 8 table for three or four graphics with the name under the graphic; a 2 x 12 table for five or six graphics; a 2 x 16 table for seven or eight graphics, etc.
**If you don't want to use tables, use Microsoft Word or another word processor of your choice to print the graphics. Just cut, paste, add labels, resize as you want and print.
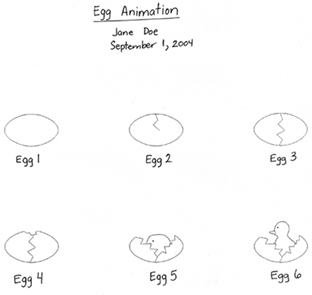
Example of Print Out:
Egg Animation
Jane Doe
September 1, 2004
|
|
Egg 1
|
Egg 2
|
|
|
|
|
Egg 3 |
Egg 4
|
|
|
|
|
Egg 5 |
Egg 6
|