Learner: Grades 4,5,6
Task 3: Create the Graphic design
Summary:
Using a pencil and paper or a graphics program, design a graphic to accompany computer name.
Outline of Detailed Explanation :
Step 1: Getting Started
Start graphics program.
Remind students to save their work frequently
Step 2: Creating the Borders
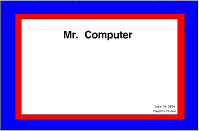
Draw a rectangle.
Draw a second smaller rectangle inside the first rectangle.
Fill the space between the large and small rectangles with colour. ( If printing in black & white, ask class to colour with crayons after the graphic is printed.)
Save your work.

Draw a third rectangle inside the second rectangle.
Fill the space between the second and third rectangles with colour. ( If printing in black & white, ask class to colour with crayons after the graphic is printed.)
Save your work.

Step 3: Adding Text
Select font and font size.
Add the Name of your computer inside the smaller rectangle.
Select smaller font size.
Add student's name, date and name of school.
Save your work.
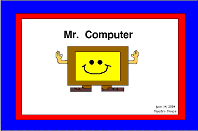
Step 4: Adding Theme Graphics
Add graphics inside the smaller rectangle (this can be freehand drawing or clipart)
Save your work.
Step 5: Printing
Copy graphic from Kid Pix.
Open word processor.
Paste the graphic into word processor.
From the word processor, print the image on a colour or black and white printer.
(Option: print 2 copies to put on left and right hand side of the computer)
Step 6: Colour the Graphic
If using a black and white printer, ask the students to colour the borders and graphic with their crayons.
Step 7: Laminate
Laminate printed copies for longer lasting pictures.
Detailed Explanation Using Kid Pix Deluxe 3 for Windows:
Step 1 – Getting Started
• Start KidPix
• Click 
• Click 
• Click 
• Click 
• When the KidPix login appears, enter your user name and click ok.
Step 2 – Creating the Borders
•  Select the “drawing” tool.
•  Select the “pencil” tool.
•  Select the smallest dot for the finest pencil thickness.
•  Select the unfilled “rectangle” from the drawing tools.
• Click and drag the cursor to draw a rectangle on the screen.
• Draw a second rectangle inside the first rectangle, creating a narrow border around your graphic. (See examples included with this book.)

• If printing in colour:
•  Select the “paint” tool.
•  Select a colour.
•  Select the solid colour “paint bucket”.
• Select the solid colour icon in the pattern choices to the right of the buckets.
Click in the space between the two rectangles to fill the area with colour.

• Move cursor to the top left corner of the screen. When the arrow appears click and select “File” and “Save As” to save the graphic. Enter a name for your graphic and click OK.
• Select the unfilled “rectangle” tool.
• Click and drag the cursor to draw a third rectangle inside the first two rectangles.
• If printing in colour:
• Select another colour
• Click in the space between the two rectangles to fill the area with colour.

•

Click the “save” icon to save your work.
Step 3 – Adding Text
•  Select the “text” tool.
•  Choose a font style and size for the title . (Suggest 12 point font for title.)
• Ask the class to click on the screen and enter their name in the box.
• Centre the textbox at the top of the innermost box by clicking on and dragging the blue line at the top of the textbox.
• Click on the screen again and enter “Multimedia Portfolio” into a second textbox.
• Centre this text below the name.

• Select a smaller font size for the remainder of the information.
• Enter date and name of school in the lower right corner of the box.
• Click the “save” icon to save your work.
Step 4 – Adding Theme Graphics
• If using clipart:
•  Select the “stamp” tool.
•  Use the up and down arrows to view more clipart choices.
• Select clipart and click inside the smallest rectangle to position your graphic.
• If drawing freehand:
• Use any of the drawing tools available to create your graphic.

• Click the “save” icon to save your work.
Step 5 – Printing
a. Open Microsoft Word.
b. Select “File”, “Save As”. Enter the document name. (e.g., PortfolioCover.doc)
c. Return to KidPix
d.  Select “Scissors” and
  choose the “Square” option.
e. To capture the entire white portion of the KidPix page, position the “Scissors” in the bottom right corner of the page, click and drag the “Scissors” to the top left corner. The entire page is now selected.
f. Press the “Alt” key to display the menu bar. Click the left mouse button. Select “Edit”. Select “Copy”.
g. Press “Alt”, “Esc” to go back to Microsoft Word.
h. Select “Edit” and “Paste” to paste the KidPix page into Microsoft Word.
i. Click  to save your work.
j. Click  to print your graphic on either a colour or black and white printer.
(Option: print 2 copies to put on left and right hand side of the computer)
Step 6: Colour the Graphic
• If using a black and white printer, ask the students to colour the borders and graphic with their crayons.
Step 7: Laminate
• Laminate printed copies for longer lasting pictures.


